Installing Exovo
Exovo installs with a single command. It pulls a small onboarding wizard that walks you through configuration in your browser, then deploys the full stack — telephony core, web console, database, media relay and reverse proxy — as containers on your host.
Requirements
| Minimum | |
|---|---|
| Host | Linux x86-64 (bare metal or VM), root/sudo access |
| Software | Docker Engine 24+ with Docker Compose v2 |
| Resources | 2 vCPU, 4 GB RAM, 20 GB disk (plus space for recordings) |
| Network | A public DNS name (FQDN) pointing at the host |
| License | Your Exovo license key |
The FQDN matters: it's the address of your web console, what remote phones and apps connect to, and — if you use automatic certificates — what the certificate is issued for. Create the DNS record before installing.
Firewall ports
Open these on the host (and forward them if the host is behind NAT):
| Port | Protocol | Purpose |
|---|---|---|
| 80, 443 | TCP | Web console, provisioning, automatic certificates (80 is needed for issuance and redirects) |
| 5060 | UDP + TCP | SIP — phones and trunk registration |
| 5061 | TCP | SIP over TLS |
| 5080 | UDP + TCP | SIP — external/trunk profile |
| 5090 | TCP + UDP | Exovo tunnel — SBC sites and mobile apps |
| 5091 | UDP | Remote-phone VPN |
| 16384–16484 | UDP | RTP media (calls) |
| 3478, 5349 | UDP/TCP | TURN — media relay for browser calling |
| 49152–49252 | UDP | TURN relay range |
Only expose what you use: a system with no remote phones, SBCs or browser calling from outside the LAN can keep everything but 80/443, 5080 and the RTP range closed to the internet. See the security hardening checklist for guidance.
Install
On the host, as root:
curl -fsSL https://get.exovo.tel/onboard | sudo bash
The script pulls the onboarding wizard and prints a link:
---------------------------------------------------------------
 Exovo onboarding is running. Open this in a browser:

     https://YOUR-BOX-IP:9443/?t=<one-time-token>

 (accept the one-time self-signed certificate warning)
---------------------------------------------------------------
Open the link (the certificate warning is expected — the wizard hasn't issued your real certificate yet; the one-time token in the URL keeps anyone else out).
The onboarding wizard
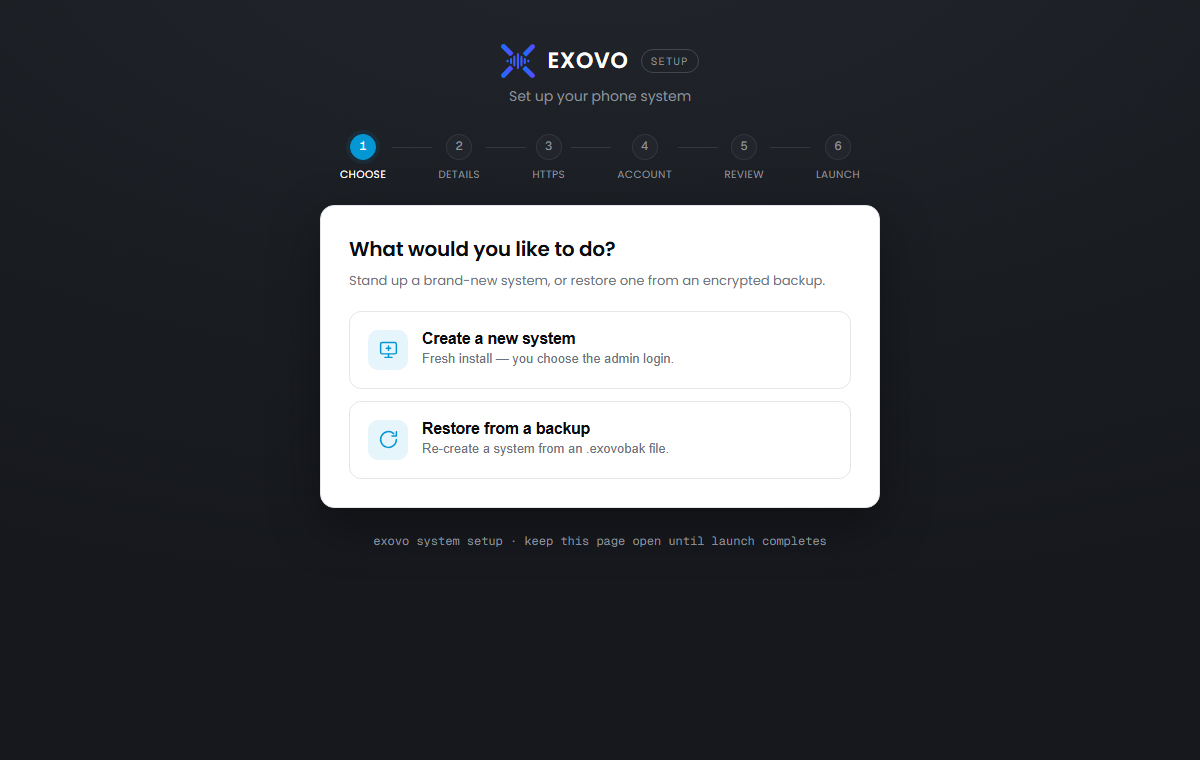
The wizard walks through:
New system or restore — set up fresh, or rebuild from an Exovo backup (see restoring onto a new system).
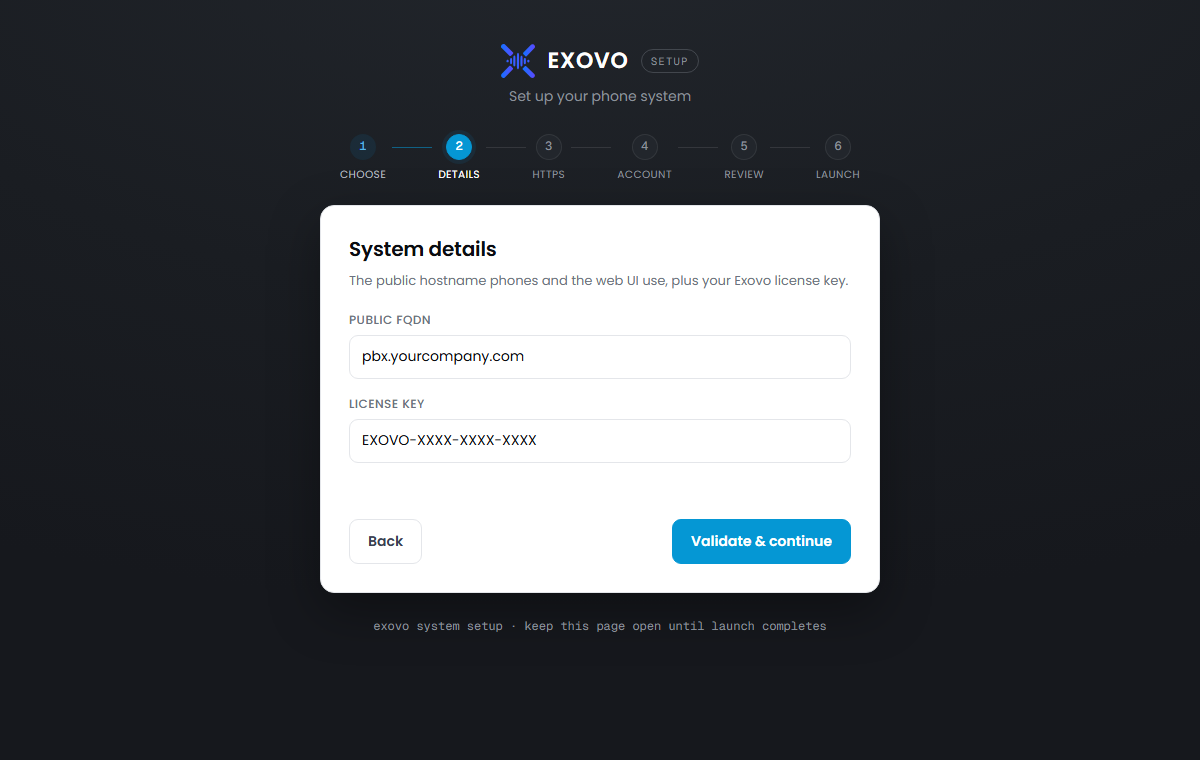
FQDN and license key — the key is validated against the Exovo portal before anything deploys.
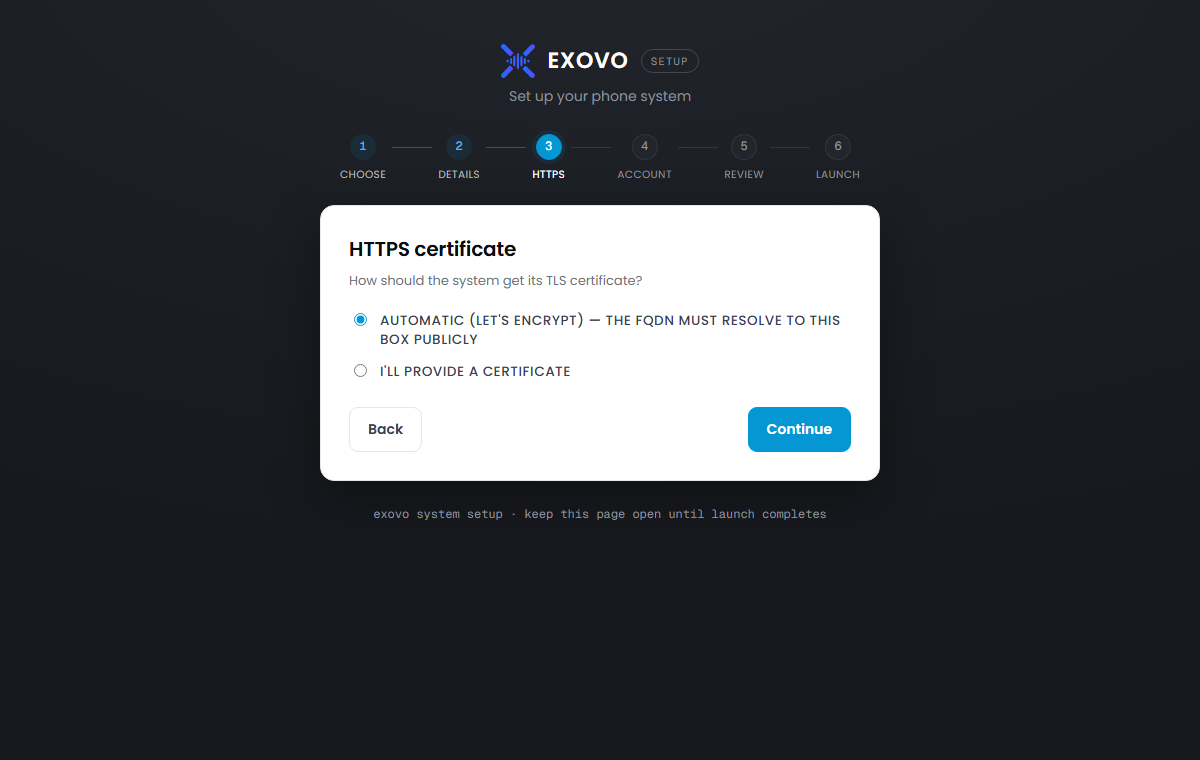
TLS certificate — automatic (recommended: issued and renewed for your FQDN, which must resolve publicly) or custom (paste your own certificate and key in PEM form).
Administrator account — email and password for the first admin login (new systems), or your backup file and passphrase (restores).
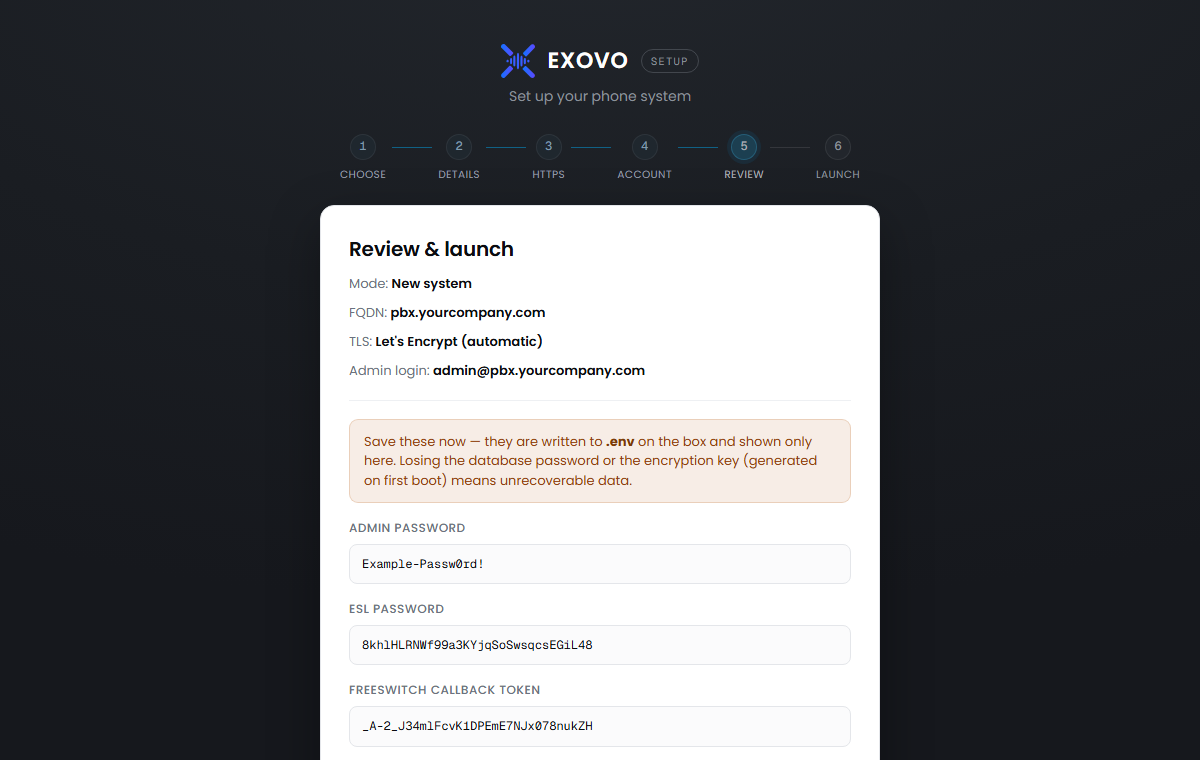
Review & launch — a final summary plus the generated internal secrets (database, telephony control, media relay). They're written into the configuration and shown once; store them with your infrastructure records.
Click Launch and the script you started takes over: it authenticates to the Exovo registry
with your license key, pulls the images, installs the host-side update/restore services, and
starts the stack. Progress is logged to /opt/exovo/deploy.log.
When it finishes, browse to https://<your-fqdn> and sign in — then continue with
first login and initial setup.
What lands where
| Path | Contents |
|---|---|
/opt/exovo |
The stack: docker-compose.yml, .env (license + secrets), deploy scripts |
/var/lib/exovo |
Your data: recordings, prompts, fax, certificates, logs |
Two small systemd watchers are installed on the host (exovo-update, exovo-restore). They're
how the web console applies system updates and staged backup
restores — a container can't safely restart its own stack, so the host does it.
Managing the stack manually
Everything is standard Docker Compose. From /opt/exovo:
./deploy.sh                # re-authenticate, pull latest images, (re)start — safe anytime
docker compose ps          # container status
docker compose logs web    # follow a service's logs
docker compose up -d       # start (uses the cached registry login)
deploy.sh also refreshes the compose file and host scripts from the release bundle, so the
configuration on disk always matches the images — don't hand-edit docker-compose.yml; changes
would be overwritten on the next update.
Re-running the installer
The installer refuses to run if /opt/exovo/.env exists, so it can't clobber a configured
system. To deliberately start over on the same host:
EXOVO_ONBOARD_FORCE=1 bash -c "$(curl -fsSL https://get.exovo.tel/onboard)"
Troubleshooting
- The wizard link doesn't load — port 9443 must be reachable from your browser to the host; it's only needed during onboarding.
- License validation fails — the host needs outbound HTTPS to the Exovo portal; check the key for typos (it's safe to re-try).
- Automatic certificate fails — the FQDN must resolve to this host from the public internet and port 80 must be reachable; otherwise use a custom certificate.
- Deploy errors — check
/opt/exovo/deploy.log; a stalled image pull usually means the host can't reachregistry.exovo.telover HTTPS.