Creating and managing tenants
Signed in as the machine operator, two extra items appear at the top of the admin sidebar: Tenant Dashboard and Tenants. Together they are the operator console — everything tenant-related happens there.
The Tenant Dashboard
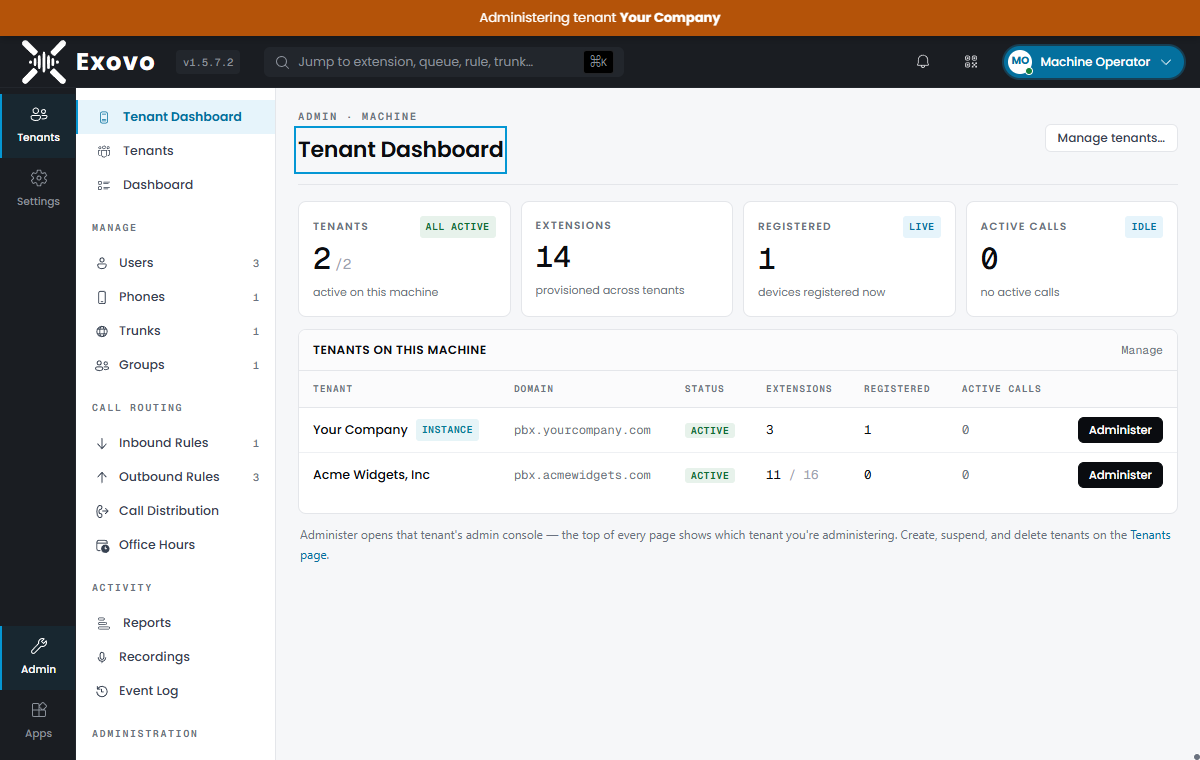
Admin → Tenant Dashboard is the live rollup across the whole machine: tiles for Tenants (active/total), Extensions provisioned across tenants, Registered devices right now, and Active Calls — all updating live from the telephony core. Below them, the tenants table shows each tenant's domain, status, extension count against its limit, registrations and active calls.
Every row has an Administer button. It switches your session into that tenant — you get the full admin console exactly as the tenant's own admin sees it, with a banner reminding you whose system you're in. That's the day-to-day support path: no per-tenant passwords to keep, no second browser.
Creating a tenant
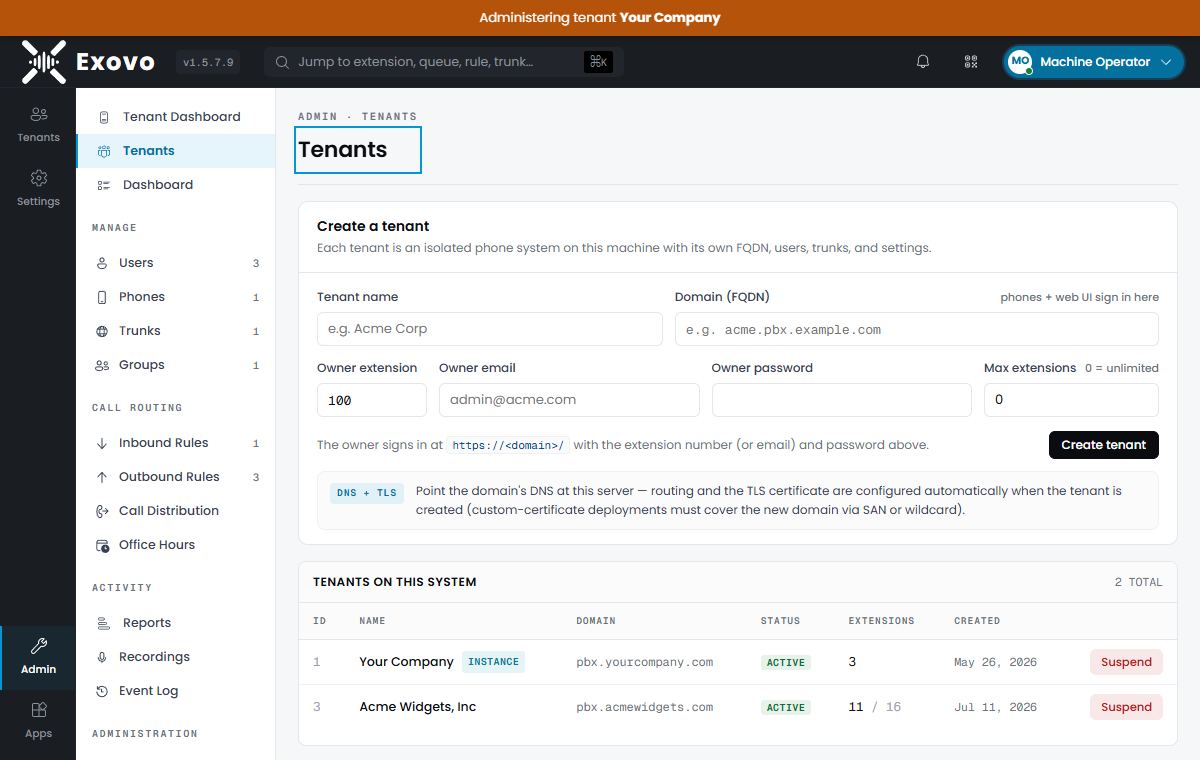
On Admin → Tenants, the Create a tenant form takes:
| Field | Meaning |
|---|---|
| Tenant name | Display name — usually the customer's business name |
| Domain (FQDN) | The tenant's own hostname — phones provision against it and users sign in there |
| Owner extension | The tenant's first extension (their system owner), default 100 |
| Owner email / password | The sign-in for the tenant's own administrator |
| Max extensions | Per-tenant extension cap, 0 = unlimited |
Point DNS for the domain at the machine before (or right after) creating the tenant. On create, Exovo publishes the routing and requests a Let's Encrypt certificate for the new domain automatically — the tenant's web console and phone provisioning are reachable at their FQDN without touching the proxy or restarting anything.
The new tenant starts with its owner account, a default group and a provisioning token — from there, its own admin (or you, via Administer) builds it out like any Exovo system: first login and initial setup.
Suspend, resume, delete
Each row on the Tenants page carries the lifecycle actions:
- Suspend blocks the tenant's users from signing in without touching any data. The operator can still administer it. Resume lifts the block.
- Delete… is permanent and deliberately heavy: the tenant must already be suspended, and the confirmation requires typing the tenant's domain before Delete forever unlocks. Configuration and database contents are removed and the domain's routing is withdrawn. Media files on disk are retained (recordings, voicemail and fax under the tenant's storage paths) in case you're keeping them for compliance — the event log records the paths so you can archive or remove them yourself.
Tenant 1 — the instance tenant — can be suspended but never deleted.
Extension limits
Max extensions is enforced when users are created inside the tenant: at the cap, no more extensions can be added until the operator raises it. The count/limit shows on both operator pages, so it's easy to see which customers are near their ceiling.